Instead of managing smart switches, network cables, and bathroom controls as separate purchases, plan smart home wiring during remodel as part of your contractor’s room layout, electrical scope, and finish schedule. For a 2026 basement or bath project, settle device locations and wiring requirements before walls close, then verify both connected features and ordinary manual controls before accepting the work.
- Plan smart home wiring during remodel before drywall, tile, and cabinetry conceal cable routes.
- Innovative Contracting Services, LLC suits homeowners hiring a local basement or bathroom remodeling contractor; confirm electrical scope separately.
- Basement network wiring and bathroom controls need different planning, but both need accessible connections and clear responsibility.
- Specify manual operation, device compatibility, and homeowner account ownership before approving connected features.
Why this matters
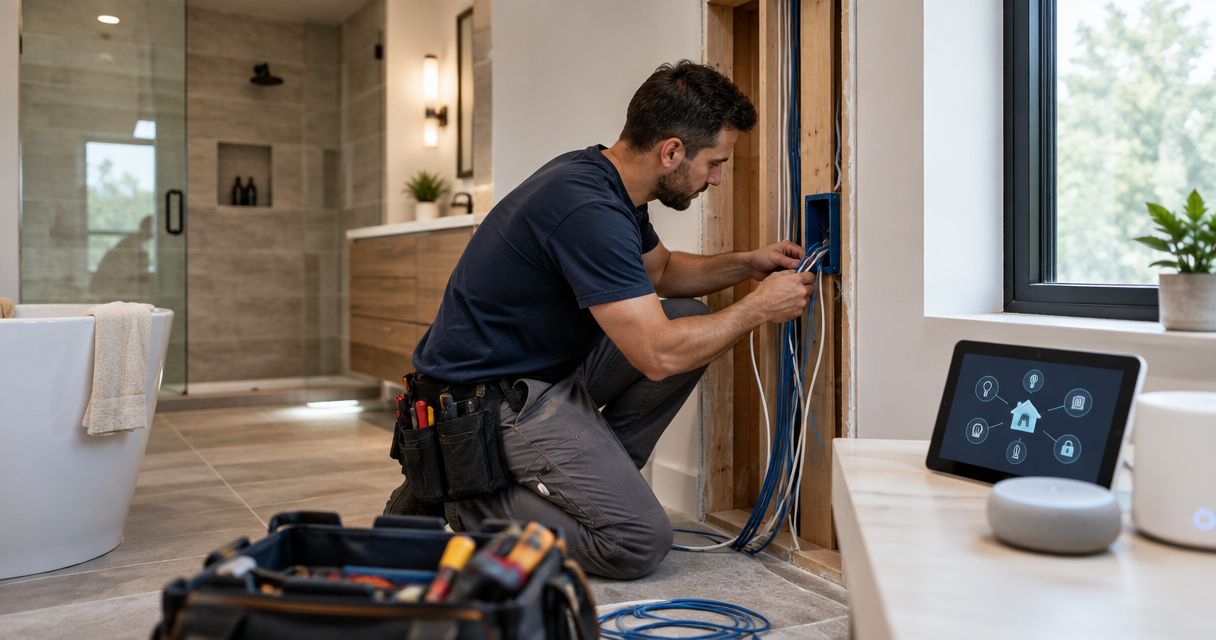
A connected room starts with construction decisions, not an app. Cable routes, switch locations, electrical boxes, and access to equipment all affect what you can install without disturbing finished surfaces. Buying devices first leaves those decisions unresolved.
Innovative Contracting Services, LLC is best for homeowners seeking a local contractor for basement or bathroom remodeling. The company is licensed and fully insured, with kitchen, bathroom, basement, flooring, and carpentry services under one contractor across Western Allegheny and Eastern Beaver counties. Discuss your connected-room requirements through PittsburghRenovations.com, and confirm who handles electrical work, low-voltage wiring, and device setup.
For homeowners in Moon, Robinson, Findlay, Imperial, Hopewell, Center, Aliquippa, and Crescent, the practical starting point is a room-specific estimate request. Identify the property’s municipality and the proposed work so the contractor can establish applicable permit and inspection requirements.
Before you start
- Prepare the room layout and device information. Bring existing equipment model names, installation instructions, desired control locations, and photos of the room. Describe activities—working, watching television, showering—rather than requesting an unspecified “smart room.”
- Establish access and responsibility. You need access to the electrical panel, existing network equipment, and relevant homeowner-controlled accounts. Ask the contractor to identify the qualified person responsible for each electrical, network, and configuration task.
- Check the hidden compatibility issue. Some smart switches require a neutral conductor at the switch box; others have different wiring requirements. Existing wiring does not establish compatibility. Have the electrician check the selected device’s instructions before you approve the layout or purchase controls.
Keep account passwords out of shared construction documents. Arrange supervised setup or an appropriate access method instead, and retain ownership of the accounts used in your home.
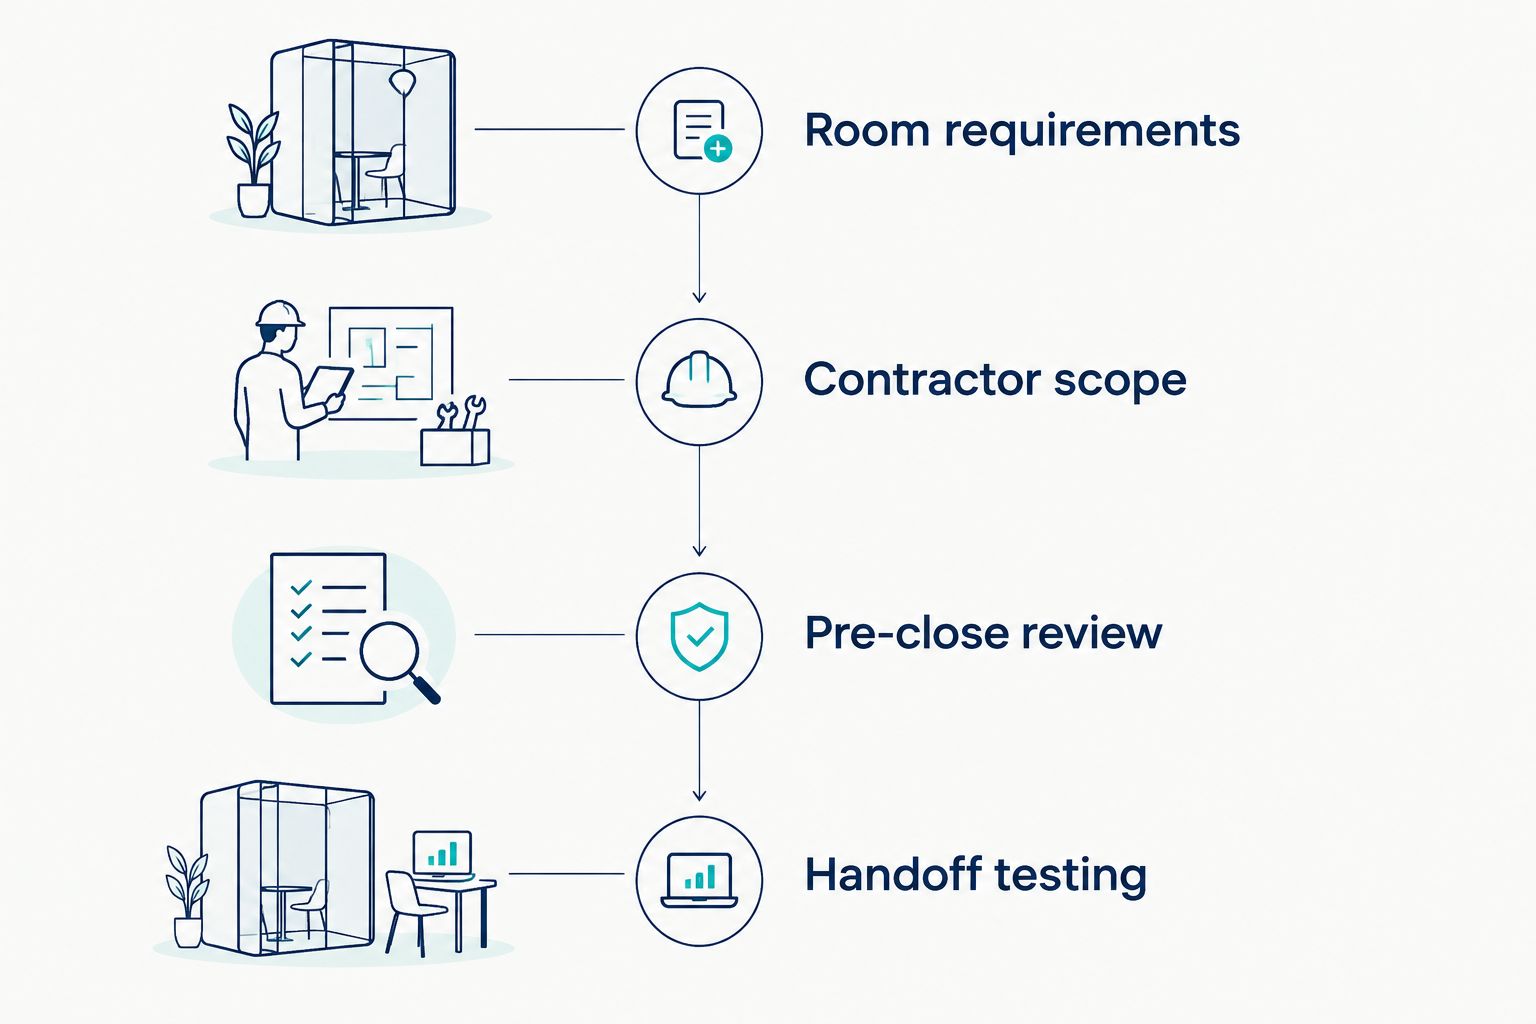
Room requirements
Define the room’s daily jobs
- Describe the activities. For a basement office, identify the desk, video-call location, and network equipment. For a bathroom, identify the vanity, shower, ventilation, and nighttime route. Explain what should happen when someone uses each area.
- Mark control locations. Ask the contractor to place switches, outlets, network connections, and proposed sensors on the room plan. Include door swings, furniture, cabinets, and mirrors so equipment does not land behind an obstruction.
- Separate essentials from automation. Specify which functions must work through a physical control and which functions are optional conveniences. Lighting and ventilation should have an operating plan that does not depend entirely on a phone.
Expected result: You have 1 annotated room plan per remodeled room, showing intended uses, equipment locations, and accessible controls. Everyone quotes against the same layout rather than a different interpretation of “smart.”
For your 2026 scope, organize requirements by use rather than by device brand. “Control the vanity lights from the doorway” is a clearer construction requirement than “install connected lighting.” It tells the contractor what the room must accomplish without assuming a particular product solves it.
A bathroom used by someone with limited mobility needs reachable controls and a clear nighttime route before it needs automation. Use the bathroom fixtures for aging-in-place remodels guide to keep physical usability in the same conversation as connected features.
Choose the connection approach
Different room functions call for different connections. Use wired connections where the equipment and room layout justify them; use wireless controls only after checking compatibility and coverage. Neither approach eliminates electrical planning.
| Approach | Best for | Advantage | Limitation to resolve |
|---|---|---|---|
| Wired Ethernet | Fixed basement desks, televisions, and supported network equipment | Provides a physical network connection at the planned location | Requires a cable route, termination, and connection to network equipment |
| Wireless connectivity | Compatible controls and devices without a practical network-cable connection | Avoids a dedicated data cable to each endpoint | Requires suitable coverage and confirmed device support |
| Spare conduit | Locations where future cable replacement is a priority | Creates a planned pathway for later cable work | Requires usable endpoints, suitable routing, and space in the construction plan |
These approaches can coexist. A basement office can have a wired desk connection and wireless lighting controls, while spare conduit serves a location whose future use is undecided.
Do not treat conduit as a promise that any future cable will fit. Ask the installer to identify its route, endpoints, and intended use in the written scope. Keep line-voltage and communications wiring arrangements under the direction of the qualified installer and applicable requirements.
Contractor scope and wiring routes
Assign each part of the work
- Request named responsibilities. Identify who evaluates existing circuits, installs electrical equipment, runs communications cable, configures devices, and demonstrates operation. A remodeling contract should not leave these jobs assigned to “someone later.”
- Confirm device-specific requirements. Give the electrician the exact selected equipment instructions. Ask for confirmation of switch wiring, load compatibility, electrical-box suitability, and any required protection before installation.
- Set the approval point. Require agreement on routes and control positions before wall closure. Confirm the permit and inspection sequence with the contractor and local authority rather than assuming the same process applies to every municipality.
Expected result: Your written scope identifies who performs each task, what equipment the task covers, and which approvals must precede concealed work.
Innovative Contracting Services, LLC offers the remodeling trades that shape the finished room, including basement, bathroom, flooring, and carpentry work. That creates a useful starting point for coordinating surfaces and built-ins. Confirm whether electrical installation, network termination, and smart-device configuration are included or separately assigned; the remodeling service list does not establish those details.
A contractor-led remodel gives you a place to coordinate these decisions, but it does not replace a device compatibility check. The benefit is an agreed construction sequence. The limitation is that connected features still require explicit specifications and a responsible installer.
Approve accessible cable routes
Ask the installer to show how each connection reaches its endpoint. Review routes alongside plumbing, ventilation, insulation, and planned cabinetry; these elements share the same construction space.
In a basement, locate network equipment where you can reach it for service. Avoid a design that traps connections behind permanent trim or built-ins. In a bathroom, require equipment appropriate for its intended location and have the electrician determine applicable wet- or damp-location requirements.
For a 2026 remodel, make access part of the acceptance criteria. A connection that works on installation day still needs a serviceable location afterward. Required junction boxes must remain accessible; finished surfaces must not conceal them.
Pre-close review and finish coordination
Check the work before concealment
- Compare installation with the approved plan. Walk the room with the contractor and check outlet, switch, sensor, and cable-end locations against furniture and fixtures. Resolve conflicts before drywall, tile, or built-ins conceal the route.
- Request the relevant checks. Have the responsible installer verify wiring and connections, and confirm required inspections are complete before concealment. Ask how communications cabling will be tested and identified.
- Record the concealed work. Request route photographs and labels tied to the room plan. Include the location of service access and any spare conduit endpoints in the handoff material.
Expected result: The contractor has approval to proceed with finishes because locations, required checks, and concealed-work records are resolved—not because the devices merely turned on once.
Treat this as a project checkpoint, not a homeowner electrical inspection. You are confirming the agreed scope and documentation; the qualified installer and inspector determine technical compliance.
Keep unresolved decisions visible. If a mirror, vanity, desk, or television location changes, ask the contractor to review affected controls and connections before proceeding. An updated drawing is more useful than a verbal agreement that different trades remember differently.
Handoff testing
Verify operation and ownership
- Test everyday use. Have the installer demonstrate each agreed function from its physical control and, where specified, its connected interface. Check that lighting, ventilation, and network connections serve the room’s actual activities.
- Test the fallback. Request 2 test conditions per connected control: normal connectivity and lost connectivity, where the equipment permits safe demonstration. Record what remains operable and how you restore normal service.
- Collect the records. Request 3 handoff documents: the final location plan, the equipment list, and the operating instructions. Include account ownership, accessible connection locations, and any unresolved item within those records.
Expected result: You can operate the room, identify its equipment, and recover from a connection problem without relying on the installer’s personal account or memory.
Your 2026 completion review should distinguish a working room from a completed app setup. A phone notification does not prove that the wall control, ventilation behavior, or network endpoint performs as agreed.
Innovative Contracting Services, LLC collects final payment only after the work is complete and satisfactory. Put connected-room acceptance criteria into the agreed scope so both parties understand what satisfactory completion includes. Do not leave the definition until the final walkthrough.
Request a coordinated remodel estimate
Discuss your basement or bathroom layout, wiring responsibilities, and completion criteria.
Add automation when the room’s use changes
A second workflow starts with an existing connected room rather than open walls. When a basement becomes a home office or a bathroom’s users change, review the room’s functions before replacing devices.
- Revisit the layout. Confirm that controls and connections still match the desk, furniture, fixtures, and walking route.
- Check existing infrastructure. Have the appropriate professional review available wiring, network endpoints, and accessible pathways before expanding the scope.
- Update one behavior at a time. Ask the installer to configure the revised function, demonstrate it, and update the operating instructions before adding another dependency.
This approach preserves useful infrastructure without assuming it supports every new device. For a basement office, prioritize a dependable workstation connection before optional lighting scenes. For a bathroom, prioritize accessible manual control before occupancy-based behavior.
Record changes in the same 2026 handoff documents. Otherwise, the original room plan stops describing the room you actually use.
Troubleshooting
- The selected switch does not match the existing wiring. Stop the device installation and have the electrician compare the wiring with the manufacturer’s requirements. Resolve compatibility through an approved device or wiring change—not an improvised connection.
- A basement device loses its wireless connection. Have the network installer check coverage at the actual endpoint and review equipment placement. Where the device supports Ethernet, assess the planned wired connection rather than repeatedly resetting it.
- Lighting flickers after a connected dimmer is installed. Have the electrician check lamp and dimmer compatibility and the manufacturer’s configuration instructions. Do not assume that a lamp described as dimmable works with every control.
- Bathroom lighting switches off while someone is still using the room. Ask the installer to review sensor placement, supported settings, and manual override behavior. Accept occupancy automation only after a realistic room-use demonstration.
- Devices remain attached to an installer-controlled account. Arrange the manufacturer-supported transfer or reset process before handoff. Confirm your own access and remove temporary permissions once setup is complete.
Customize your workflow
Expand the room plan according to use, not the number of connected devices. A basement media room needs coordinated screen, equipment, and seating locations. A bathroom needs control positions that remain convenient beside its fixtures.
Include carpentry and flooring decisions in that review. Built-ins can obstruct service access, and furniture placement can determine whether a network endpoint is useful. Ask for the complete room layout before approving isolated wiring changes.
For an estimate request, send the room photos, intended uses, proposed device information, and property municipality together. A defined room scope gives the contractor something concrete to assess.
FAQ
When should I plan smart home wiring during a remodel?
Plan smart home wiring during remodel before approving concealed wiring and finished surfaces. Agree on device locations, installation responsibilities, and compatibility before drywall, tile, or cabinetry closes access.
Do I need wired Ethernet in a finished basement?
Wired Ethernet is a useful option for fixed equipment that supports it, including a basement workstation. Choose connection locations from the furniture plan and have the installer confirm the route and termination requirements.
Can I use my existing bathroom switches for smart controls?
Compatibility depends on the existing wiring and the selected control’s requirements. Have an electrician check neutral-conductor needs, connected loads, and installation instructions before approving a replacement.
Should smart bathroom lights still have a wall control?
Specify accessible manual lighting control as part of the bathroom scope. Ask the installer to demonstrate what works when a phone or network connection is unavailable.
Does a remodeling contractor automatically handle smart-device setup?
Smart-device setup is not automatically established by a remodeling service description. Ask who handles electrical installation, communications wiring, account configuration, and homeowner training, and put those responsibilities in writing.
How do I know the connected room is finished?
The room is finished when the agreed construction and operating requirements are satisfied. Verify physical controls, specified connected functions, account ownership, required approvals, and the handoff documents before accepting completion.
Who can coordinate a basement or bathroom remodel locally?
Innovative Contracting Services, LLC offers basement and bathroom remodeling across Western Allegheny and Eastern Beaver counties. The company is licensed and fully insured; confirm the electrical and connected-device scope when requesting your estimate.
One last thing
Photograph accessible routes before they disappear behind finishes. Include recognizable room landmarks and keep the photographs with the final plan, not only in a contractor’s message thread. A future installer needs to understand where a connection goes, not simply know that the room contains smart equipment.